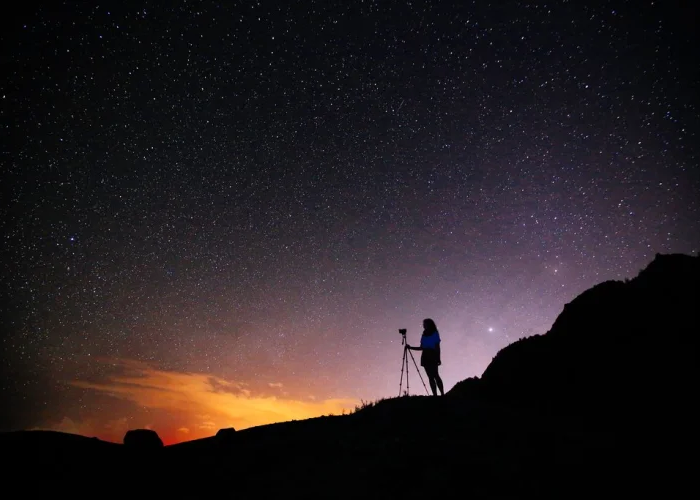
Night photography is an incredibly fascinating form of photography. It allows the photographer to capture the beauty of the night sky and the world around it. But it’s also a tricky type of photography, requiring the right equipment, settings, and techniques. In this blog post, we’ll discuss the necessary equipment and settings for night photography, how to capture stars in the night sky, how to illuminate the landscape at night, and how to creatively enhance your photos for a truly stunning result.
Equipment and Settings Necessary for Night Photography
When it comes to night photography, the right equipment and settings are essential. You’ll need a camera with manual exposure settings, a tripod, and a lens with a wide aperture, such as f/2.8. You’ll also need a remote shutter release or a timer to avoid a camera shake. You should also have a flashlight with you in case you need to adjust your settings in the dark.
When it comes to settings, you’ll want to start with a relatively low ISO of around 400 or 800. You’ll also want to set your shutter speed to between 15 and 30 seconds, depending on the brightness of the scene. Finally, you’ll want to set your aperture to the lowest available setting, usually between f/2.8 and f/4.
Capturing Stars in the Night Sky
Capturing stars in the night sky can be a tricky endeavor. To get the best results, you’ll want to find a location with minimal light pollution. You’ll also want to set your ISO to the lowest possible setting, usually around 400 or 800. You’ll also want to set your shutter speed to 30 seconds, and your aperture to the lowest available setting, usually between f/2.8 and f/4.
Once you’ve set your settings, you’ll want to point your camera at the night sky and take a series of long-exposure shots. This will allow you to capture the stars as they move across the sky.
Illuminating the Landscape at Night
When photographing the landscape at night, you’ll want to use a technique called light painting. This involves using a light source, such as a flashlight or a headlamp, to “paint” light onto your subject.
To do this, you’ll want to set your camera to a long exposure, usually around 15 to 30 seconds. Then, you’ll need to move the light source around your subject for the duration of the exposure. This will allow you to “paint” light onto the subject, creating a stunningly illuminated photo.
Creatively Enhancing Your Photos
Once you’ve taken your photos, you can take them to the next level by creatively enhancing them in post-processing. This can be done using a variety of techniques, such as color grading, contrast adjustment, vignetting, and HDR (high dynamic range) processing.
By using these techniques, you can create stunningly creative photos that truly capture the beauty of the night sky and the world around it.
Conclusion
Night photography can be a tricky but incredibly rewarding form of photography. With the right equipment and settings, you can capture the beauty of the night sky and the world around it. By following the tips in this post, you’ll be well on your way to capturing stunningly beautiful night photos. So get out there and start shooting!
